- DSI CLEAR
- Theory & Practice
- Accessibility Online
- Keyboard Navigation
- Headings, Lists & Tables
- Text Formatting & Links
- Images & Alt Text
- Shapes, Texture, & Color Contrast
- Saving Accessible PDFs from Microsoft Office
- Checking & Fixing PDFs for Accessibility
- Fillable PDF Forms
- Audio & Video Captioning
- Publisher & Third Party Content Accessibility Tips
- Content Language Accessibility
- STEM Accessibility
- Music Accessibility
- Glossary of Accessibility Terms
- Compliance Checklist
- SensusAccess
- Copyright Guide
- Online Teaching
- UNT Syllabus Template
- Teaching Consultation Request
Saving Accessible PDFs from Microsoft Office
When PDFs are not accessible, the best recommendation we can make is to remediate the source file (e.g., DOC, PPT, XLS, etc.), and then re-generate your PDF with the proper options selected when exporting. Instructions for doing this are below. If you do not have the source file, then we recommend reaching out to your Subject Librarian for assistance with tracking down an original source file or an accessible version, and/or the Office of Disability Access for assistance with remediating an existing PDF for a student who has a letter of accommodation.
Contents
Microsoft Word to Accessible PDF
In order to create an accessible PDF, you must start with a fully accessible Microsoft Word document. To ensure your document is accessible, please review the Microsoft Word sections of the following pages:
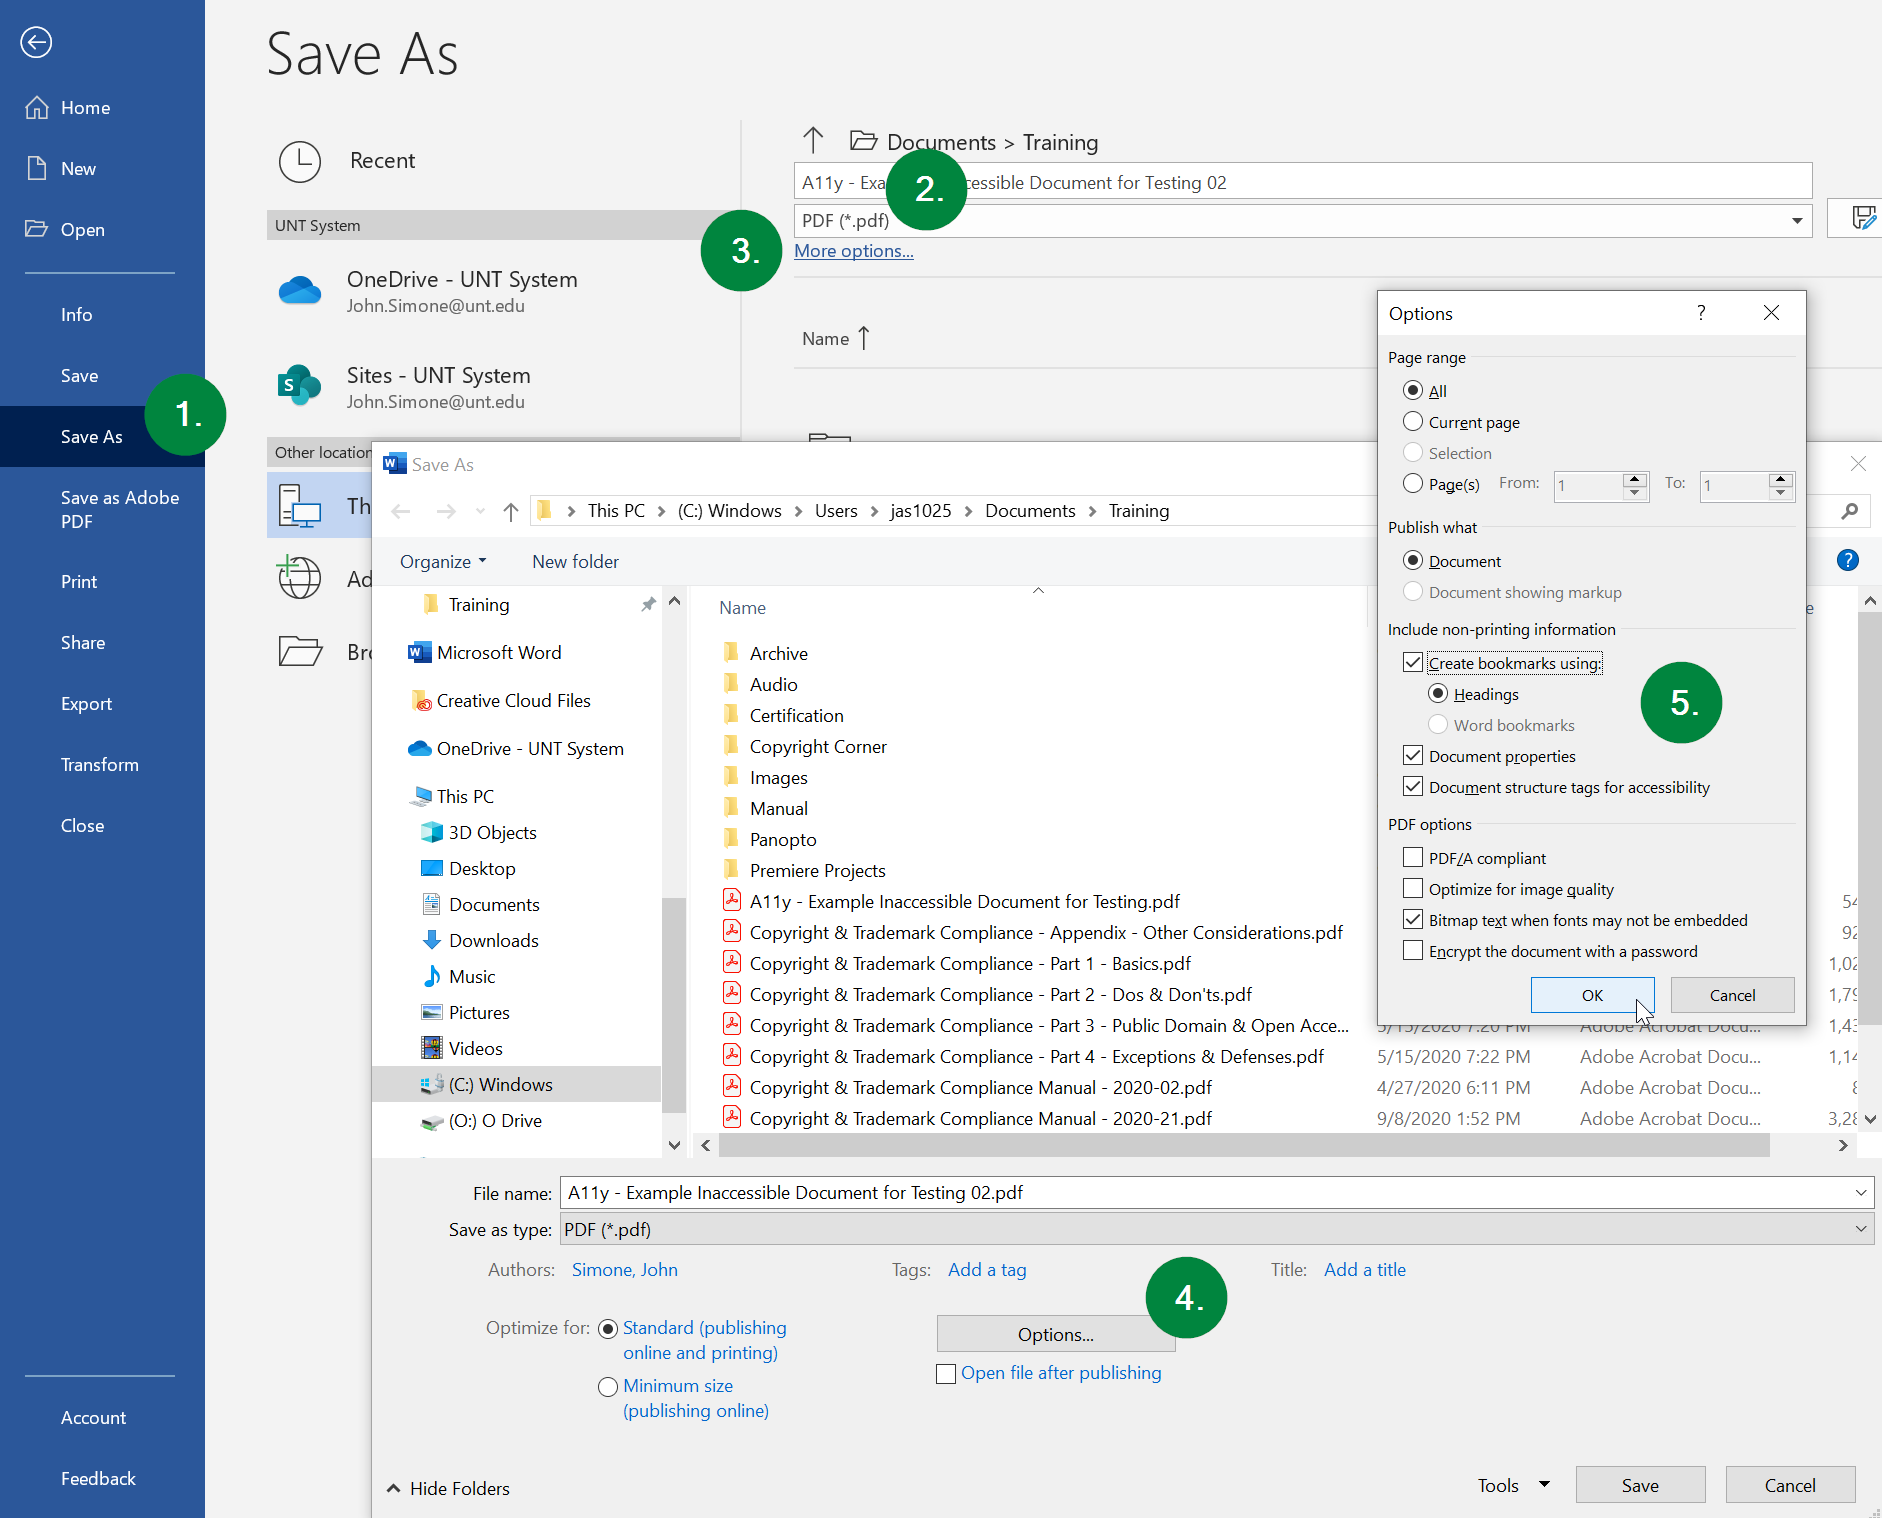
To export your Word document to an accessible PDF, start by clicking the "File" menu toward the top left corner of Microsoft Word window. That should produce a view similar to the screen capture directly below . Next:
-
Select "Save As" from the left-side menu,
-
Click the file extension/type drop-down menu and choose "PDF (*.pdf)." Then,
-
Select the "More options..." blue link just below the drop-down menu. When the "Save As" window appears,
-
Select the "Options" button at the bottom of that window. This will pop up one more small window for your PDF "Options."
-
Here, you want ensure that "Create bookmarks using:" is checked if you have headings or bookmarks of any kind in your document (recommended for longer documents of 10 pages or more), "Document properties" is checked, and "Document structure tags for accessibility" is also checked.
Lastly, select the "Okay" button in the Options window, and finish by selecting the "Save" button in the Save As window.

Congratulations! You should now have a fully accessible PDF document!
Microsoft PowerPoint to Accessible PDF
In order to create an accessible PDF, you must start with a fully accessible Microsoft PowerPoint presentation. To ensure your slideshow is accessible, please review the general information and Microsoft PowerPoint sections of the following pages:
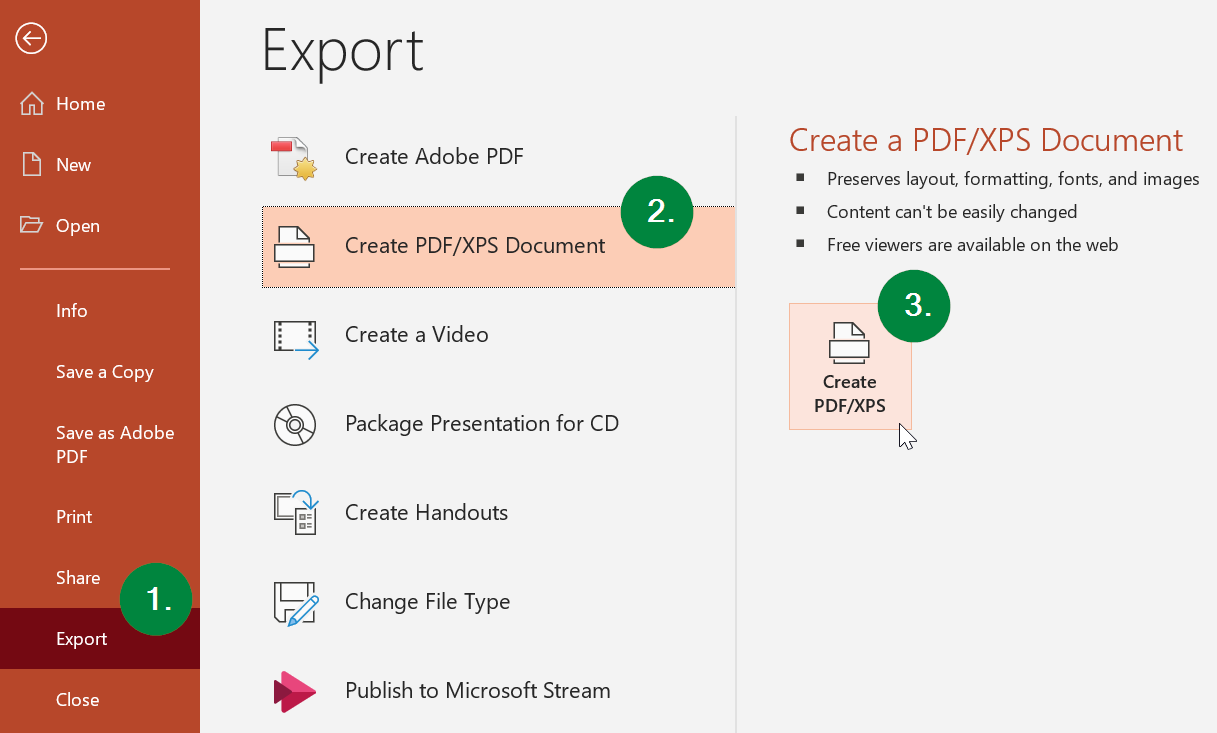
To export your PowerPoint presentation to an accessible PDF, start by clicking the "File" menu toward the top left corner of the PowerPoint window. That should produce a view similar to the screen capture directly below. Next:
-
Select "Export" from the left-side menu,
-
Select "Create PDF/XPS Document" from the Export menu, and then
-
Select the "Create PDF/XPS" button.

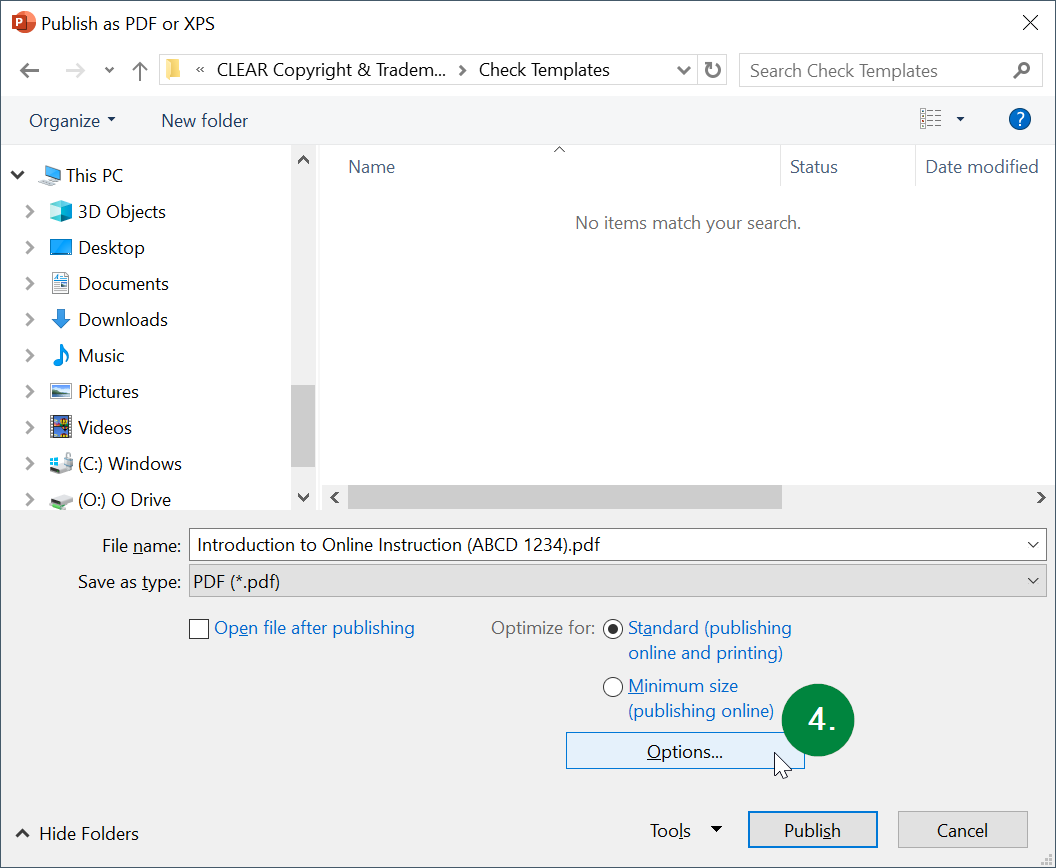
When the "Publish as PDF or XPS" window appears, (4) select the "Options" button at the bottom of that window. This will pop up one more small window containing your PDF options menu.

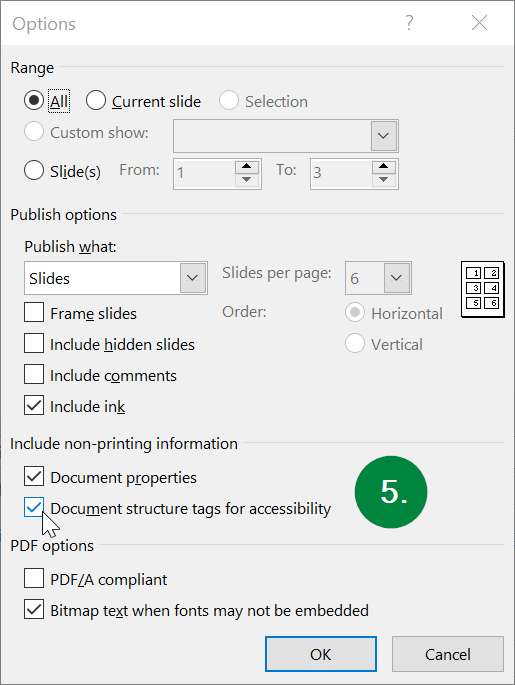
Here, you want ensure (5) that both "Document properties" and "Document structure tags for accessibility" are both checked, per the screen capture directly below. Lastly, select the "OK" button in the Options window, and finish by selecting the "Publish" button in the "Publish as PDF or XPS" window (pictured above).

Congratulations! You should now have a fully accessible PDF presentation!