- DSI CLEAR
- Theory & Practice
- Accessibility Online
- Keyboard Navigation
- Headings, Lists & Tables
- Text Formatting & Links
- Images & Alt Text
- Shapes, Texture, & Color Contrast
- Saving Accessible PDFs from Microsoft Office
- Checking & Fixing PDFs for Accessibility
- Fillable PDF Forms
- Audio & Video Captioning
- Publisher & Third Party Content Accessibility Tips
- Content Language Accessibility
- STEM Accessibility
- Music Accessibility
- Glossary of Accessibility Terms
- Compliance Checklist
- SensusAccess
- Copyright Guide
- Online Teaching
- UNT Syllabus Template
- Teaching Consultation Request
Audio & Video Captioning
To make your content accessible to people who are deaf or hard-of-hearing, include closed captioning/subtitles or transcripts with all audio and video content. Contextual captioning for video is best, but when inclusion of captioning is not possible, or when audio-only content is published, it is best to include a transcript. In the event a transcript is advisable, simply provide a link to a Word Document containing a textual transcript of the words spoken in the audio or video within your page, directly above or below the audio or video.
Most popular video streaming services provide automatic captioning of content. However, the automatic captioning needs to be edited for accuracy. Below, we detail how to edit the automatic captions generated by these services.

Contents
- How to Edit YouTube Automatic Captions
- How to Edit Zoom Automatic Captions
- How to Edit Canvas Studio Automatic Captions
How to Edit YouTube Automatic Captions
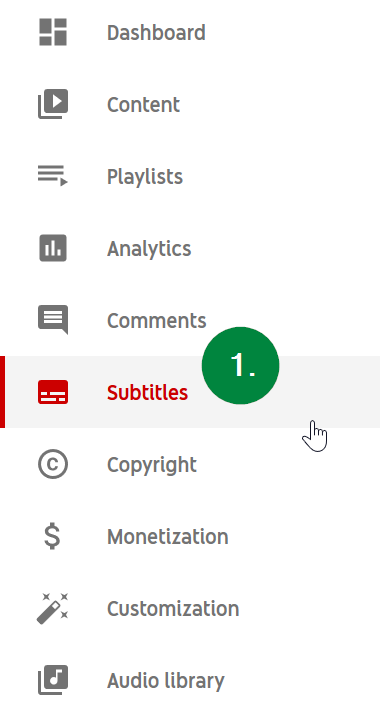
Once you have signed into YouTube Studio and uploaded your video to YouTube, (1) select "Subtitles" from the left-side navigation bar.
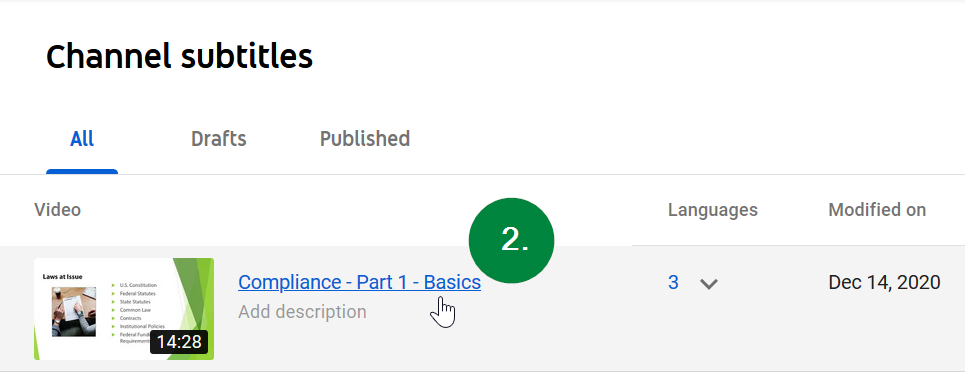
Then, (2) select the video you wish to edit.
On the subsequent page, (3) locate the "Automatic" captions and select the "Duplicate and Edit" option on the right-side of the window. If you do not see "Automatic" captions, and you recently uploaded your video, YouTube may have not generated them yet. The time it takes YouTube to generate the automatic captions depends on the video's length and the complexity of the audio. Check back again in an hour.

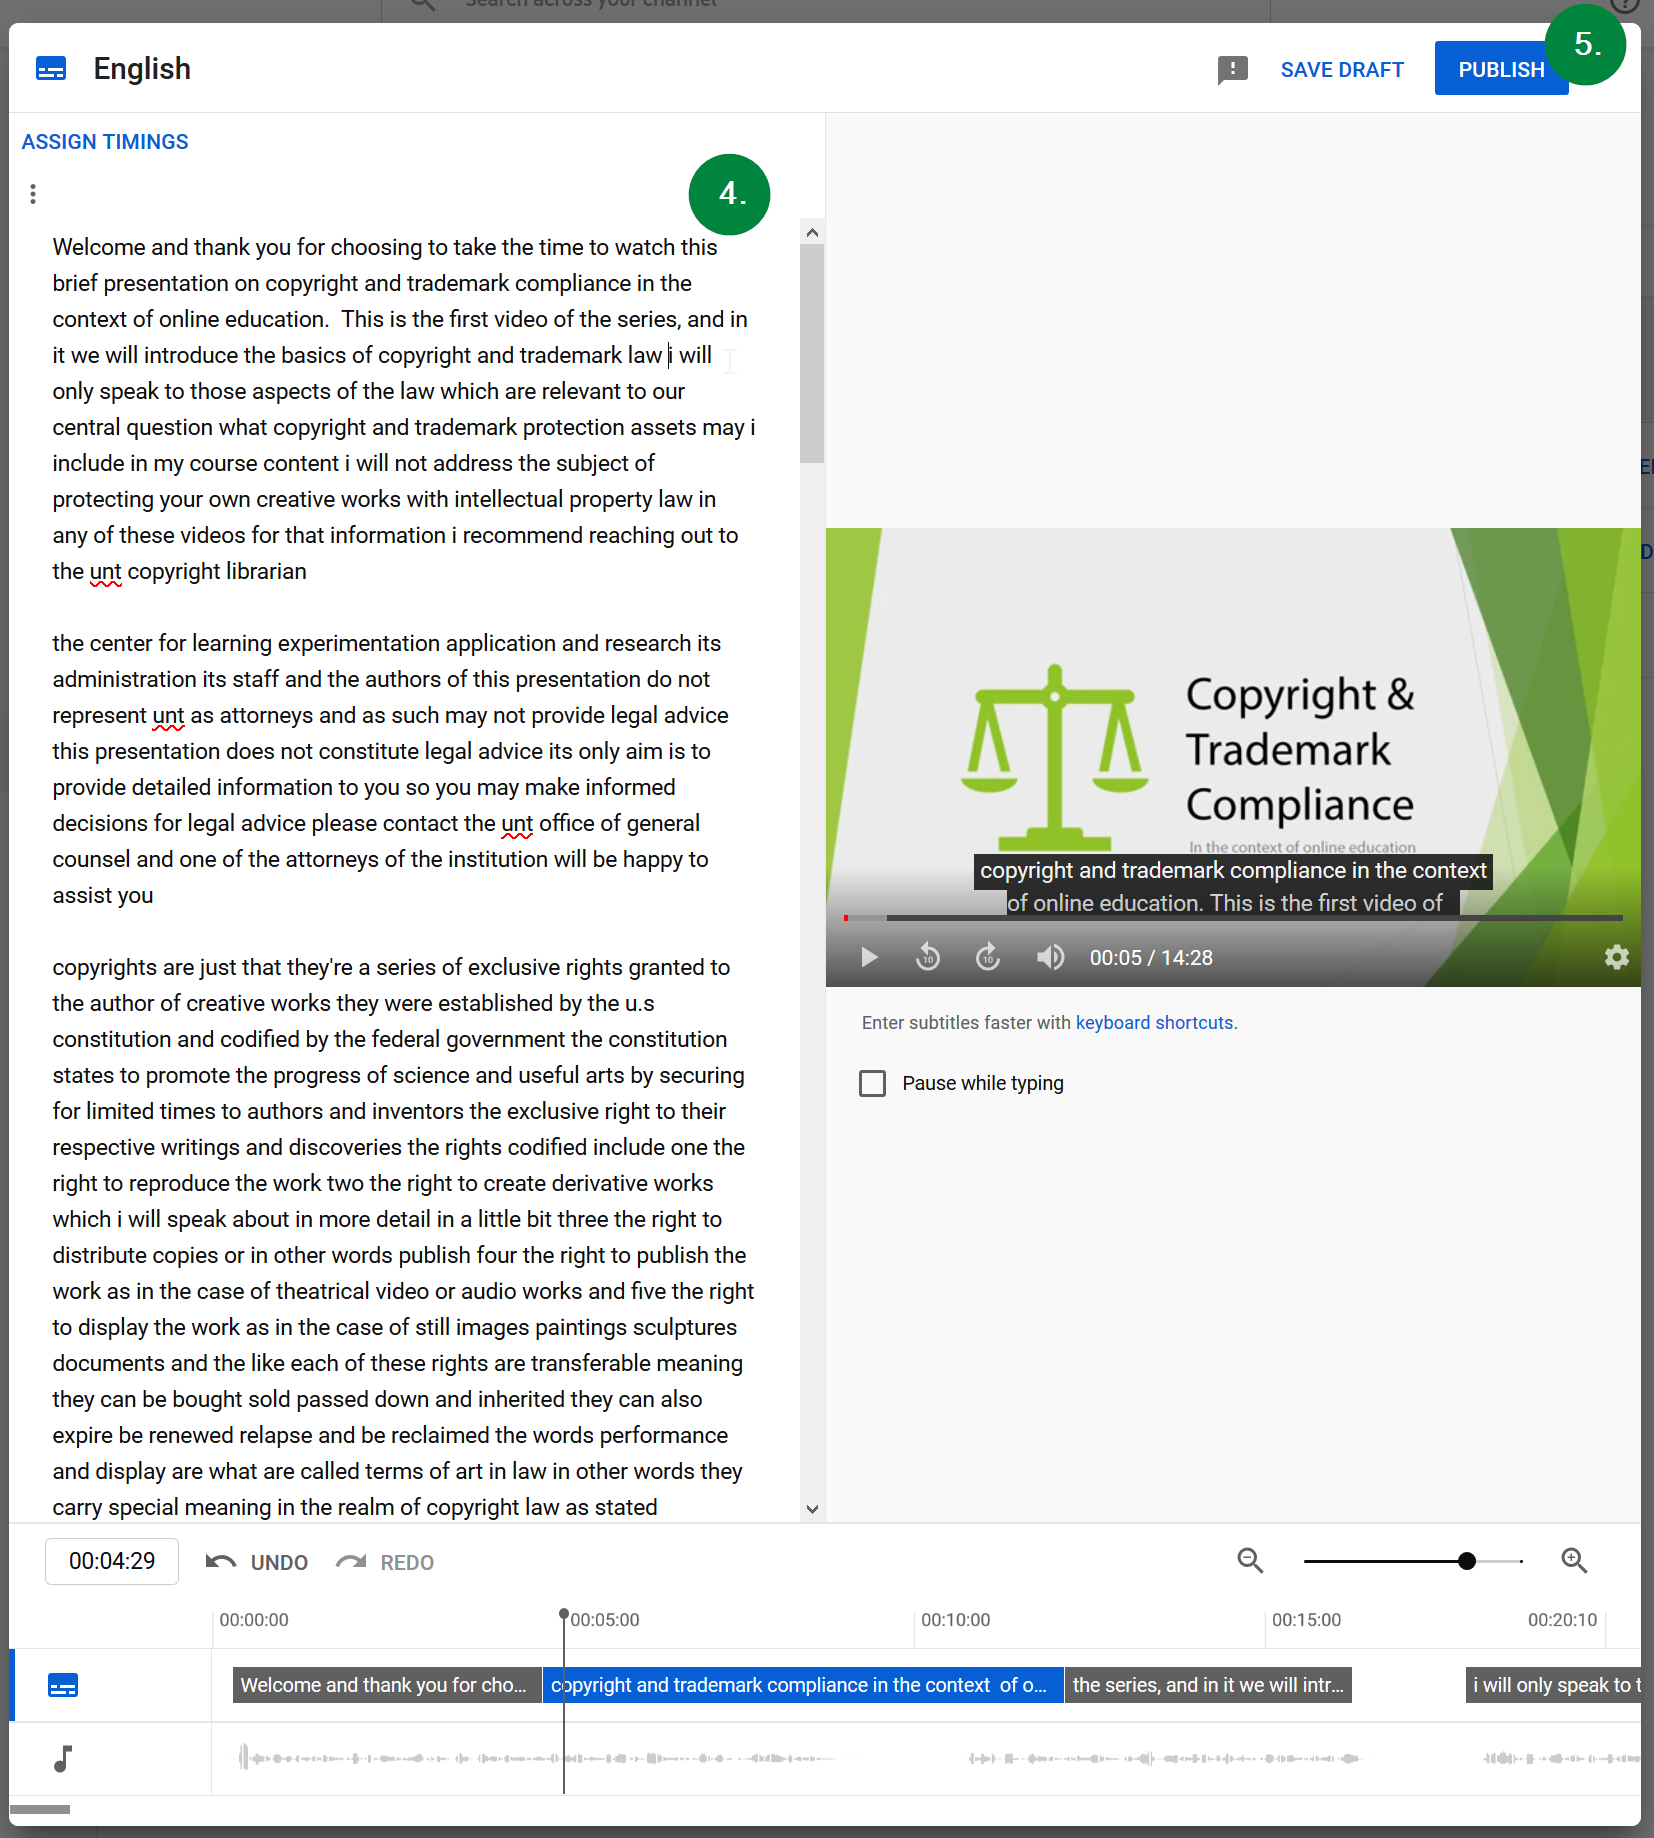
Lastly, (4) edit the text which makes up the closed captions/subtitles in the left side of the window, and finish by (5) selecting the "Publish" button at the top right corner.
Congratulations! You have corrected your YouTube video closed captions and your video is now accessible!
How to Edit Zoom Automatic Captions
Captions are automatically added to Zoom videos when they are saved in the cloud. These captions can then be edited online in the UNT Zoom web portal.
If you have saved your Zoom meeting recording locally to your own computer, rather than in the cloud, please refer to the Sharing a local recording Zoom Help Center page.
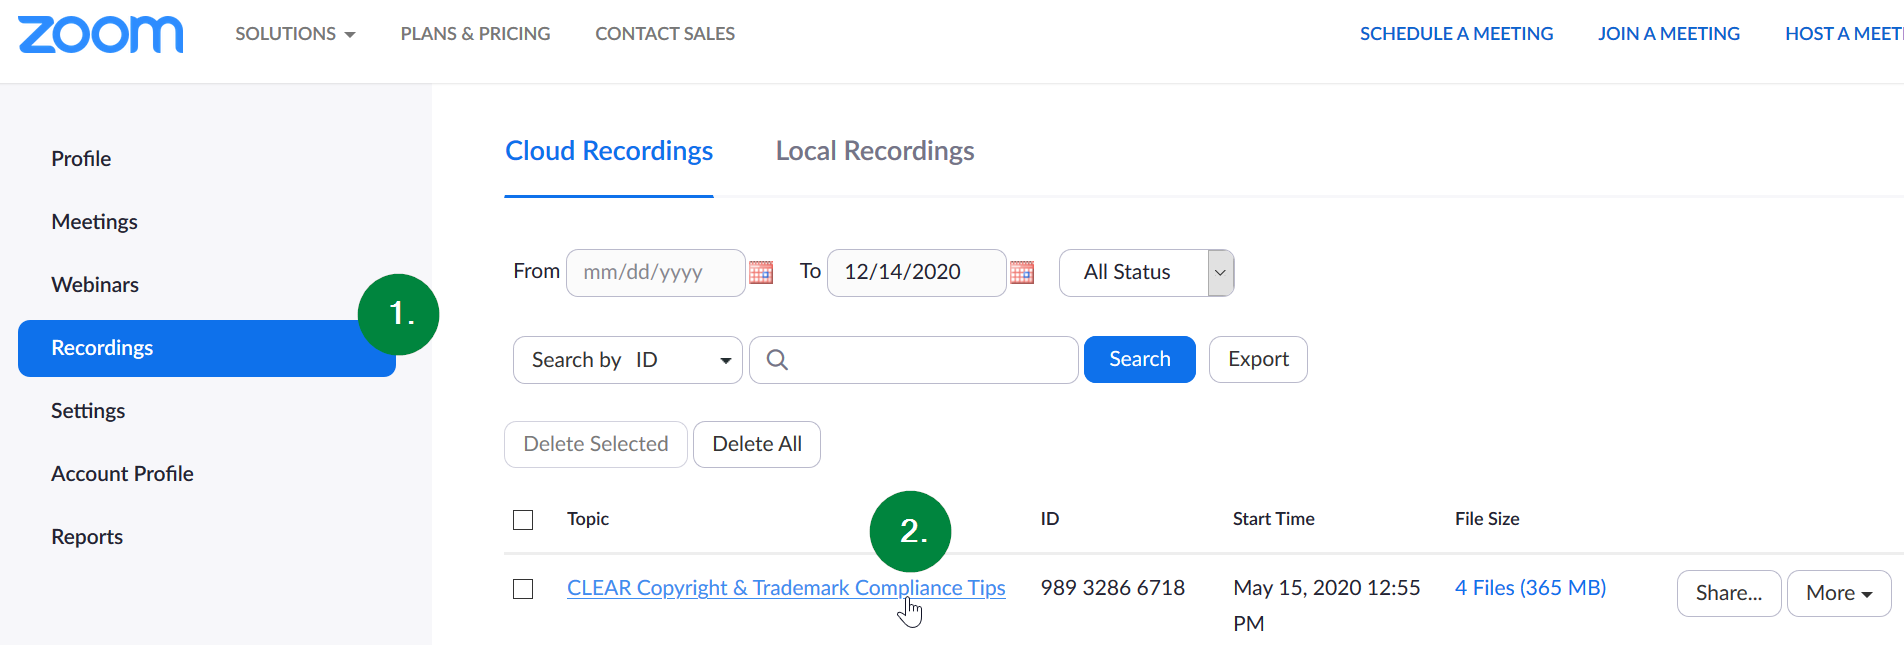
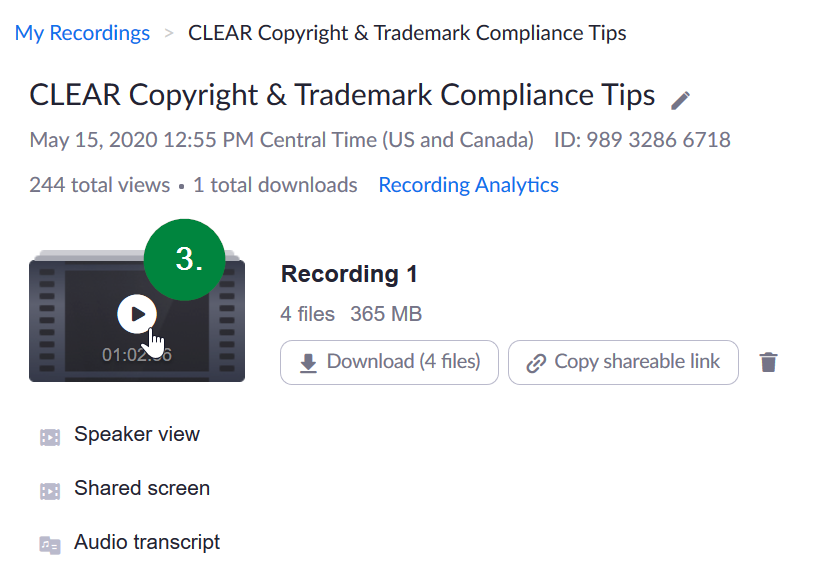
To start, log into the UNT Zoom web portal. Select (1) "Recordings" in the left-side navigation bar, and then (2) select the title of the video for which you wish to correct the captions from the list in the central pane of the web portal.
Next, (3) select the play button in the center of the video icon to begin playing the video.
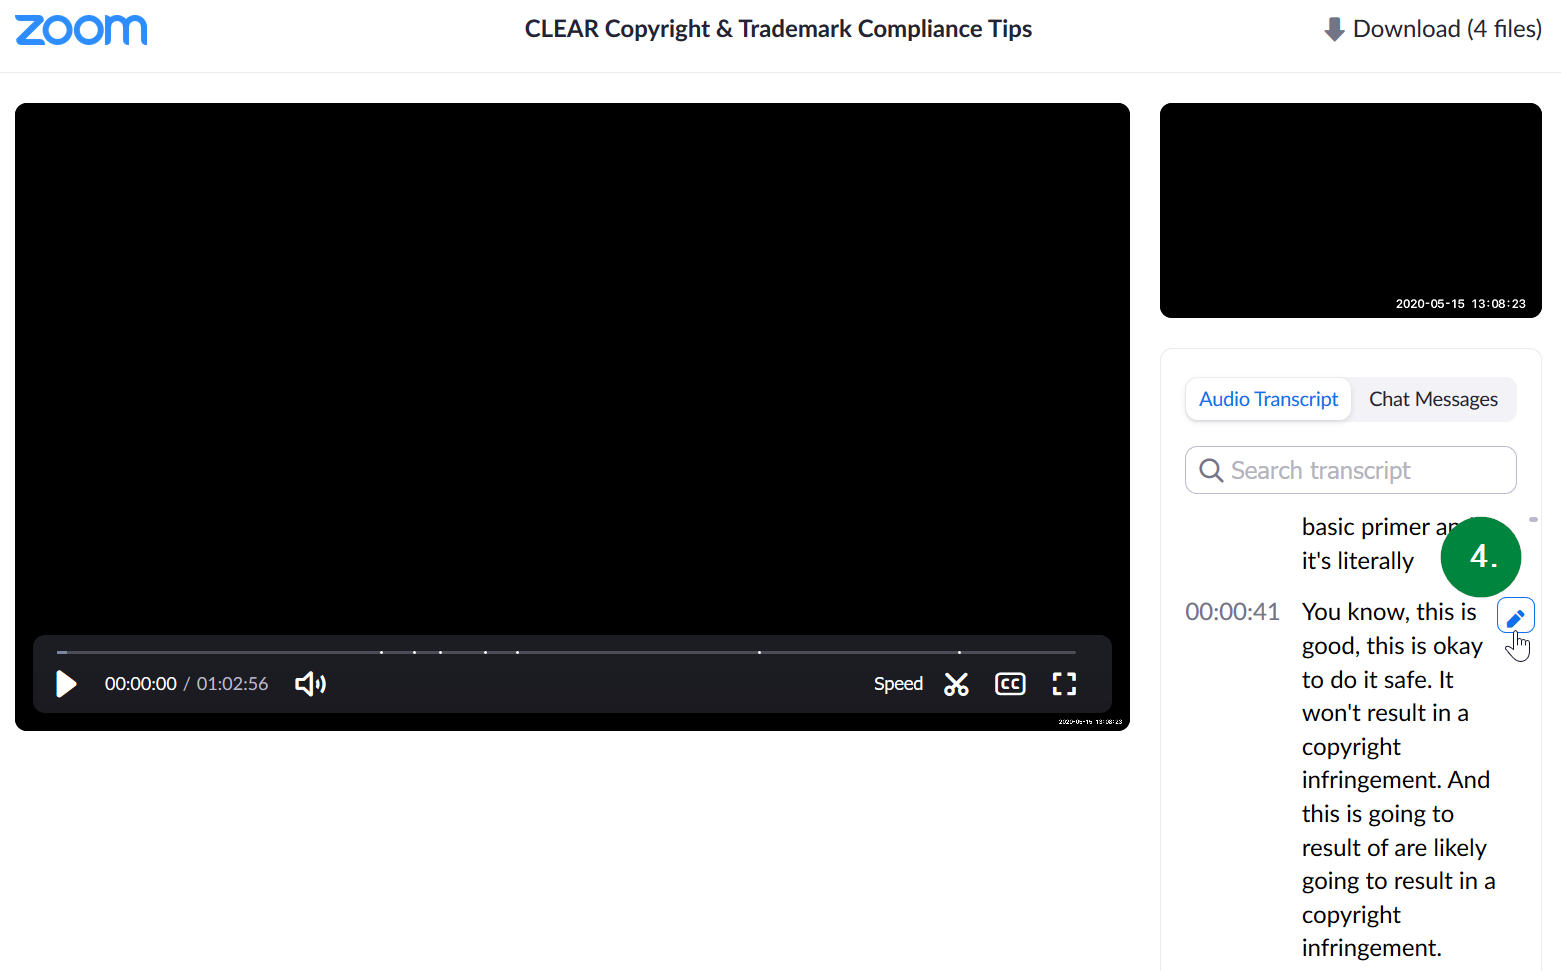
Within the subsequent page, the captions should appear along the right side. If there are no captions, and this is a recently recorded Zoom meeting, then Zoom may not have finished generating them. Check back again in an hour. Scroll through the captions on the right side. When you find a caption in need of editing, hover your mouse cursor over it and an edit icon in the shape of a pencil in a box will appear. Select (4) the icon, to edit the caption text.
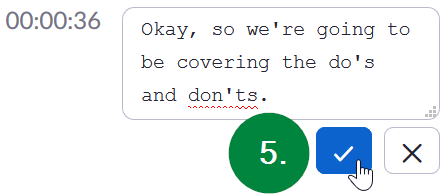
When you have completed each edit, (5) select the checkbox icon below the text to save it. When you are done, close the window.
Congratulations! You have corrected your Zoom meeting closed captions and your video is now accessible!
How to Edit Canvas Studio Automatic Captions
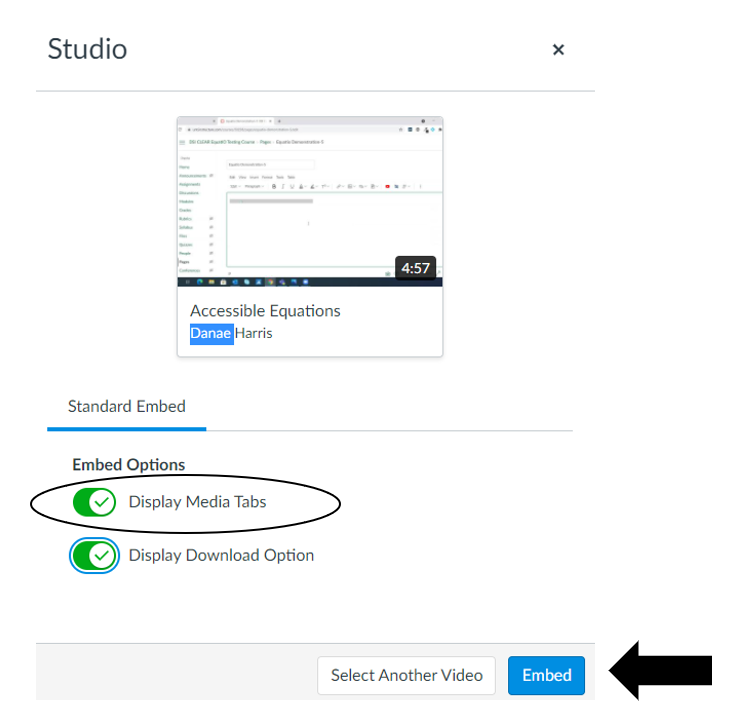
Within your course in Canvas, select Studio on the left-hand navigation menu. After you have chosen the video you want to embed within Canvas make sure to select the ‘Display Media Tabs’ option before clicking the ‘Embed’ button.
After the video has been uploaded select the ‘Caption’ tab located under the video pane.
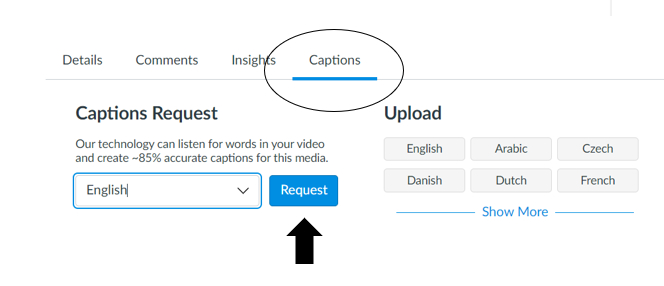
Under ‘Captions Request’ select the appropriate language and click the Request button. Your captions will be Studio-generated and will show as “queued” or in other words being created.
*Note: If you are experiencing longer than usual time for your captions to generate, save your content in Canvas. Then go back into the editing mode within Canvas. Select the ‘Captions’ tab located under the video pane.
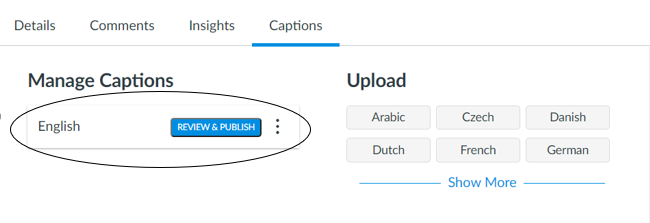
Under ‘Manage Captions’, select ‘Review & Publish’.
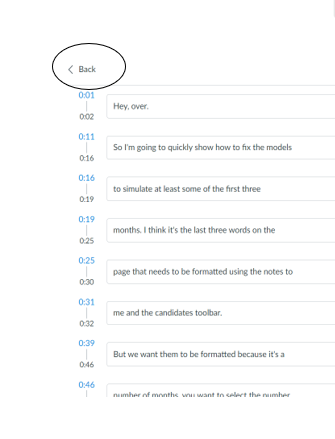
A time stamped transcript will appear. Review the transcript for any misinterpreted or misspelled words. Click in each comment box to erase and add text. When done making corrections to the transcript, select the Back button located above the transcript.
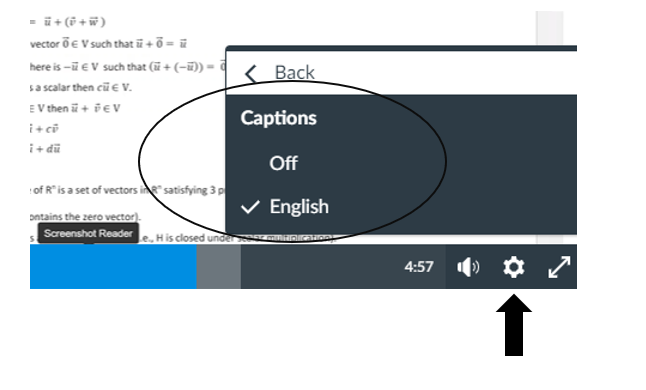
View your video to ensure that your captions are visible. Click on the settings button (a gear icon), select ‘Captions’, and select ‘English’.
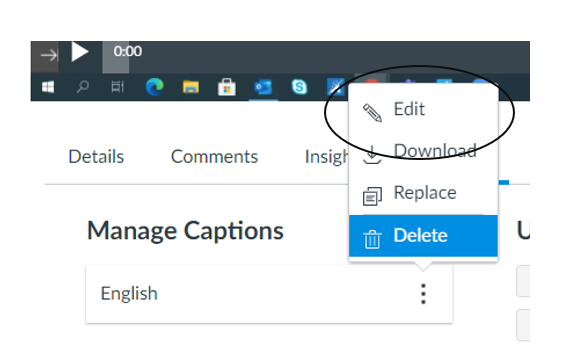
If you notice the captions are incorrect, make changes to the time stamped transcript. Click on the Captions tab under the video pane, under ‘Manage Captions’ Select the Edit option, which will take you to the timestamped transcript shown previously.
Congratulations! You have corrected your Canvas Studio video closed captions and your video is now accessible!