Zoom in Canvas

Zoom is UNT’s web conferencing tool. Zoom is the leader in modern enterprise video communications, with a reliable platform for video/audio conferencing, collaboration, chat, and webinars across mobile devices, desktop computers, and telephones.
Zoom is UNT’s web conferencing tool. Zoom is the leader in modern enterprise video communications, with a reliable platform for video/audio conferencing, collaboration, chat, and webinars across mobile devices, desktop computers, and telephones.
Please note the default Zoom Meeting license capacity for UNT users is 300 participants (per session). To verify your current UNT Zoom services please visit this page: Verify UNT Zoom services. To request increased capacity licenses and add-ons, please contact DSI Tech at dsitech@unt.edu for details and service availability.
If you plan to use Zoom breakout rooms as a part of your course, we suggest you familiarize yourself with the Zoom Breakout Rooms Training content. Please note Canvas does not currently authenticate student’s into Zoom via For pre-assigned breakout rooms to function properly for your class, students will need to sign in to Zoom directly so they can be identified by the platform and placed into the proper breakout room.
How to Access and use Zoom within Canvas.
Note: The Zoom integration in Canvas requires you to use your UNT Account Management System (AMS) preferred email address as your preferred email address in Canvas to function properly. If you have not used Zoom previously, click the Sign In button at https://unt.zoom.us before accessing Zoom in Canvas.
Step 1. Access Zoom
Method 1: Access Zoom
- Access Zoom in the Course Menu
Method 2: Add Zoom to a Module
- Go to your Canvas course and select the "Modules" menu item.
- Click on the "+" icon at the top-right of the module.
- Under the drop-down menu that defaults to "Assignment," select "External Tool."
- Scroll down and select "Zoom."
- Do not alter the URL that auto-populates under "URL."
- Under "Page Name," you can give your new module item a name. Only you will see it.
- Click "Add Item."
Leave the new item unpublished. It is only for you, and clicking on it will lead you to your Zoom menu (explained below).
Step 2. Schedule a Meeting
Your Zoom menu (pictured below) shows upcoming and previous meetings, your personal meeting room, and cloud recordings. When students access this menu, they only see upcoming and previous meetings and the cloud recordings.
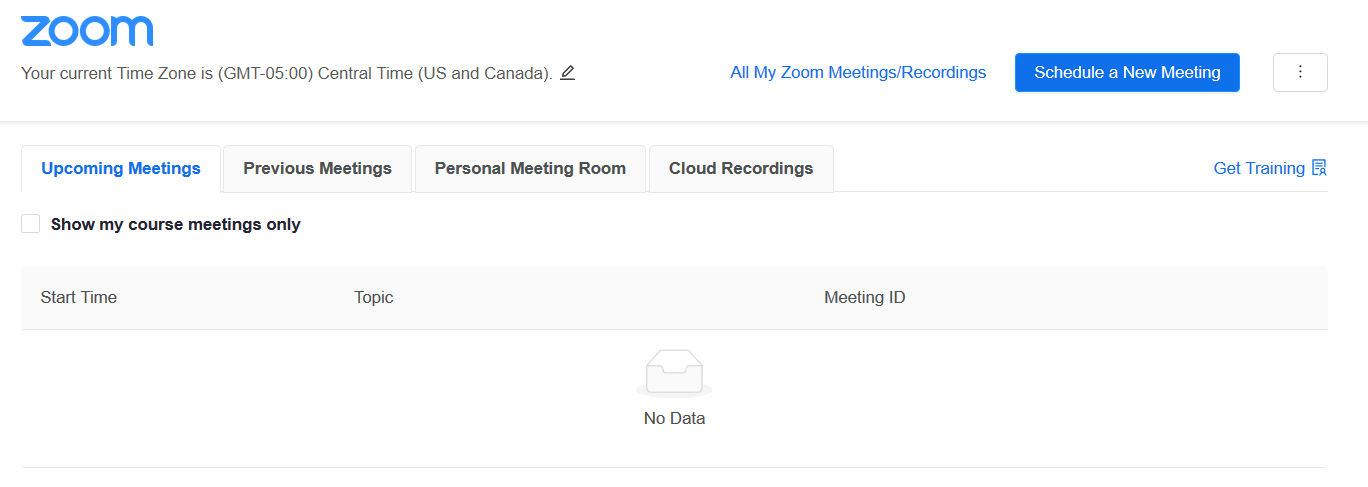
 From within the Zoom menu, select "Schedule a New Meeting" (pictured right). In the
next page, you can choose to modify these settings:
From within the Zoom menu, select "Schedule a New Meeting" (pictured right). In the
next page, you can choose to modify these settings:
- Topic and Description (optional).
- When your meeting can begin, as well as Duration and the Time Zone that will be listed alongside the meeting's time.
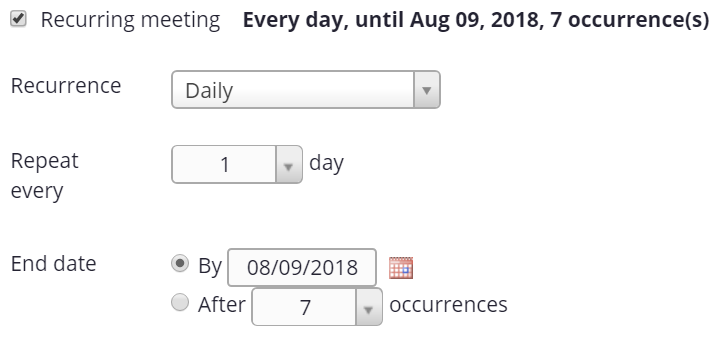 Recurring meeting (pictured right) to make this meeting recur daily, weekly, monthly, or at no fixed
time. You can also specify an end to the recurrence.
Recurring meeting (pictured right) to make this meeting recur daily, weekly, monthly, or at no fixed
time. You can also specify an end to the recurrence.- You can choose to make Registration for the meeting mandatory.
- Turning on the Video option for host or participant enables the user's camera as soon as they enter the meeting.
- The Audio option allows you to choose to enable Telephone or Computer Audio (or both) for a meeting.
- Under Meeting Options, you can:
-
- Require a meeting password
- Enable participants to join before you (the host); if you do not enable this, students will see a notification that says "Please wait for the host to start this meeting."
- Mute participants upon entry (recommended)
- Enable a waiting room
- Record the meeting automatically; if you do not enable this option, you can still begin recording the meeting anytime after it begins.
- Alternative Hosts: This option allows you to designate another person as the host of your meeting.
- Click "Save" to be taken to the meeting's page. This page can also be accessed through "Upcoming Meetings" in your Zoom menu.
Multiple instructors (or teaching assistants) within a course cannot view meetings that each other have scheduled. For example, if an instructor schedules a Zoom meeting, their co-instructor or TA cannot see that meeting unless they go into "student view." Instructions for entering student view are below:
-
- Within your Canvas course, select the "Home" menu item.
- On the right-hand side of your page, select "Student View."
- You can now see how your course appears to a student. To exit student view, select "Leave Student View" at the bottom right.
Step 3. Invite Students
Students will automatically receive a Canvas notification, and the Zoom meeting will be placed on the course calendar.
Step 4. Use Meeting Tools
As soon as a user goes to the "Join URL" described above, they will have a series of options for communicating with other students and the meeting host. As a meeting host, you can use multiple tools (pictured below) that Zoom explains in a video about meeting controls.

- Invite allows you to send an e-mail invitation to a student, copy the Join URL, or copy an invitation that can be inserted into an invitation message.
- Manage Participants activates a window that displays participants who are currently in the meeting. When you hover over a user's name, you can mute the user or rename them.
- Polls are a tool that prompts the host to create a question and allows participants to vote on it.
- Share Screen displays all browser windows that you can select to show to meeting participants.
 Chat automatically allows students to speak with the instructor and fellow participants.
Notifications appear for new messages, and students can select icons within chat that
signify "yes," "no," "go slower," "go faster," "dislike," "like," "need a break,"
and "away."
Chat automatically allows students to speak with the instructor and fellow participants.
Notifications appear for new messages, and students can select icons within chat that
signify "yes," "no," "go slower," "go faster," "dislike," "like," "need a break,"
and "away."- Record presents a choice between storing recordings on this computer or online in your Zoom menu.
- Closed Captions allows the host to write their own closed captions, use a third-party tool to create
captions, or select a student to transcribe the meeting.
- To select a participant who will write captions, point your mouse at their name and click "More."
- Select "Assign to type Close Caption."
- Breakout Rooms facilitate separation of participants into their own groups for brief discussions. Participants can be brought back into a meeting at any time.
Step 5. Record and Archive Meetings
If you select "Record" in a meeting, you can opt to store the recorded meeting on your computer or on the Cloud.
-
- If you choose to store the recording on your computer, a "Zoom" folder will be created in your File Explorer under "Documents." When the meeting has concluded, its recording will appear within that folder.
- Recordings stored on the Cloud will appear in the "Cloud Recordings" tab within your Zoom menu. You will be sent an e-mail when the Cloud recording is ready.
Additional Zoom Tips
For additional UNT Zoom tips and tutorials please visit: classroomsupport.unt.edu/zoomtips